LIGHTNING PHOTOGRAPY

PROJECT
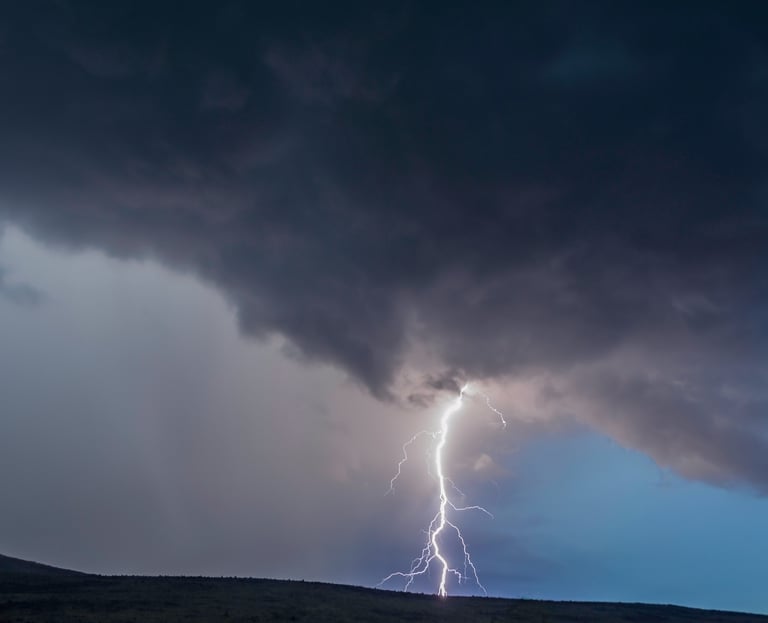
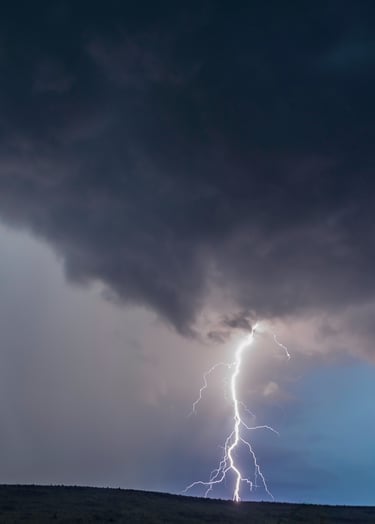
Storm Chasing captures the raw power of nature. This series focuses on the dramatic interplay of lightning and mountain silhouettes, emphasizing the scale of the elements. I aim to document the fleeting moments of pure energy that define our skies.
How to start photographing lightning
I’d like to share how I photograph lightning and storms. People who see me out photographing lightning, as well as those who see the photos, always say the same thing, “you must have a very fast camera.”
Lightning photography is very dangerous and it’s important to keep yourself, as the photographer, safe at all times. Generally if you can hear the thunder you’re close enough to be struck. Lightning can strike as far as 10 km from the cloud.
A general rule of thumb is if you are getting rained on, you’re too close. With that out of the way lets talk about how to photograph lightning.
Camera Gear
  • A good sturdy tripod.
  • A camera with adjustable shutter capabilities, preferably with a shutter speed 15 seconds or longer.
  • If you’re using an slr camera you will need a wide angle lens for best results. For the lighting photos you see on this page I used a Nikon 14-24 mm f/2.8, and 16-35 mm f/2.8.
  • A remote release is always useful. Remember for lightning photography you will be using a slow shutter speed.
Setting up and getting the shot
When i see a lightning storm I watch to see how often the strikes happen. If the strikes seem to happen every 30 seconds to a minute apart and if they are strikes from the sky to ground or from sky to sky, I find an open area where I can see for miles, or maybe a hill top over looking a clearing where I can see the storm coming. Well i say “see” but it should be in a dark area with little light.
That’s not to say a great lightning storm can’t be photographed in the day time, later afternoon, or early evening. It’s just easier to get good photos when it’s completely or close to completely dark.
After I find a good safe place to photograph from, I set my tripod and camera up pointing in the direction of the cloud with lightning, and if at all possible I try to get something interesting in the foreground.
Lightning Photography Camera Settings
Next, I count the time between the lightning strikes to get an idea of what shutter speed I should set the camera on. Generally I set the shutter on 15-30 seconds. I set the f-stop to about f/8 or greater if I need to cut the light even more to get the exposure correct on the strike.
When I have the camera set to where I want to start and I have an idea of how often the strikes occur, I press the shutter button and wait. Yes i wait. No speed needed. If any lightning strikes occur during the time my shutter is open and it’s in the field of view of my lens, I’ve captured that strike.
I then check my camera LCD screen to see if I need to adjust the f-stop darker or lighter. After the first strike is captured and if the lightning is striking any where from every few seconds up to 30 seconds apart, I continually press the shutter so that I’m taking a photo every 15-30 seconds with exposure times being 15-30 seconds long. If it’s a good electrical storm with a lot of strikes, I can capture 2-4 strikes in a single 30 second exposure frame.